Crochet Viking ship
This Viking ship is an advanced Crochet Pattern. Find out how you can get the full 1 hour video tutorial on how to make this ship.
Crochet Materials
Crochet hook size 3.00 mm and 1.9 mm.
Crochet yarn 2 ply 100 % cotton in multicolored white and blue.
Beads: 1 purple + 4 white.
Sewing needle.
Scissors.
Special Crochet Stitches:
Slanting Cluster (SCL): (Yarn over, insert hook into previous DC from right to left, yarn over, pull loop through) x 3, yarn over, pull through first 5 loops on hook, yarn over, pull through both loops on hook.
Bubble stitch: Yarn over 7 times, insert hook in next st, yarn over and pull through stitch, yarn over and pull through all 7 loops on hook.
Front Loop Treble and Front Loop Double Treble (FPTR and FPDTR): Skip next 3 sts, FPTR or FPDTR around next 3 sts.
Crochet Viking Ship Instructions
This pattern uses US stitch abbreviation. The
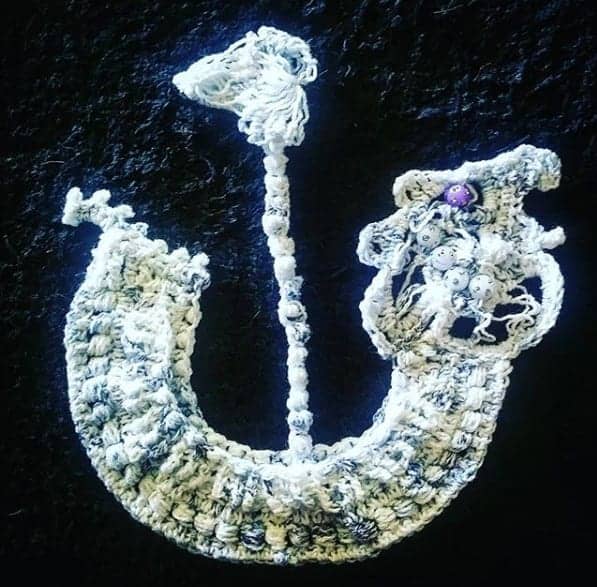
Begin crochet the main part of the ship. It will look like the image below. You will be using stitches like SCL, FPTR, FPDTR, and Bullion stitch.
Use a 3.00 mm crochet hook size.
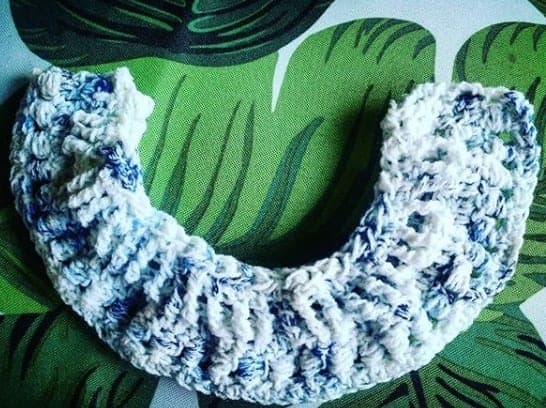
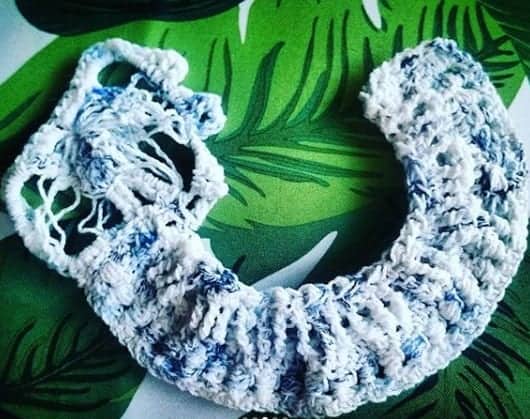
Row 1. Ch 60, turn, 1 sc in 2nd ch from hook, 1 sc in remaining ch to end. Turn.
Row 2. CH 3, * 1 dc in next sc, 1 SCL, sk next sc*, rep between ** to end. Turn.
Row 3 Ch 3, * 1 dc in next SCL, 1 dc in ch sp between SCL*, rep between ** to end. Turn.
Row 4. Ch 2, 1 hdc in next 2 sts, * skip 3 dc, (FPTR in next dc) x 3*, rep between ** to last 3 dc, 1 hdc in next 3 dc. Turn.
Row 5. Ch 3, 1 tr in next 2 hdc, * 3 FPDTR in skipped dc from previous row*, rep between ** to end, end with 1 tr in last 3 hdc. Turn.
Row 6. Ch 2,
Row 7. Reattach yarn in FPTR from row 4. Continue crochet in FPTR as follows: 1 bullion st in FPTR, 1 hdc in next FPTR. Continue to end of FPTR. Fasten off.
Dragon head
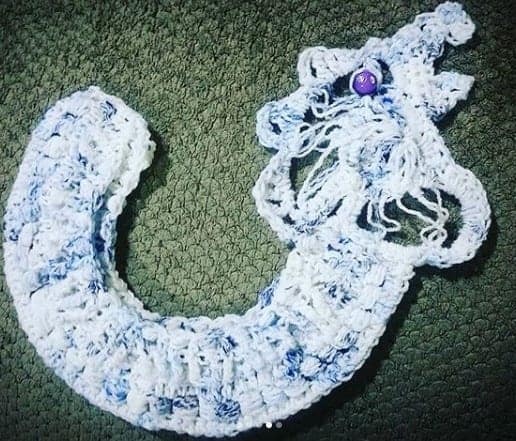
Begin crochet dragon head that will go at the front of
Use the 3rd smallest setting on the heirloom. 19 loops each side with sc in the middle. Remove work from
On the other side: 2 loops together with sc, ch 2, 2 loops together with sc, ch 4, 3 loops together with sc, crochet down 3 loops with 3 sc + 3-ch picot + 4 sc, ch 3, 5 loops together, crochet up 5 loops with 6 sc, 4-ch picot,
Attach dragon head to boat and begin crochet beak.
Use a 1.9 mm crochet hook size. 8
In the opening behind the beak, stitch a few strings up and down to give the impression of an eye. I also attached a bead there to add to the impression of an eye. :)
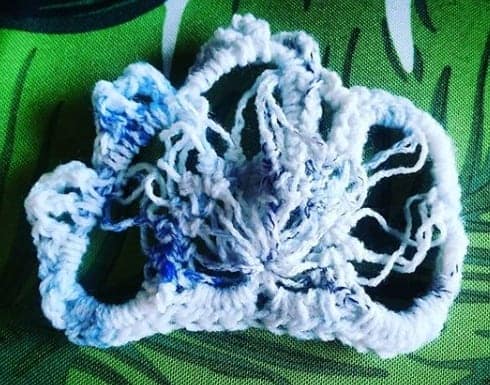
Crochet stern.
Row 1. Attach yarn in hdc row 7, 1 hdc in next 4 sts, 1 dc, 1 tr, 1 dtr, 1 ttr, dttr. Turn.
Row 2. Ch 4, turn and crochet down ch 4 with 7 sc, tr in next st, dc in next st, hdc in next st, sc in remaining sts.
Row 3. *3-ch picot, sl st in next st*, rep between ** across. Fasten off. Weave in ends.
Flag
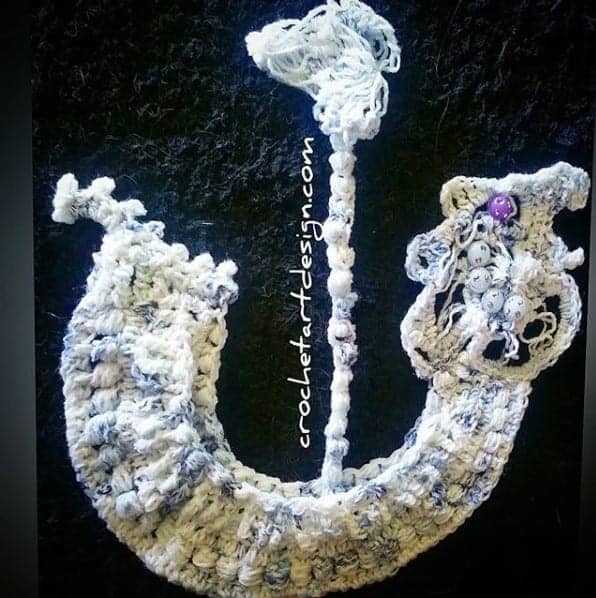
You will create the flat using both normal crochet and hairpin crochet.
Begin crochet flag pole. Ch 41, turn, *1 bullion st in 3rd ch from hook,
Attach loop on heirloom, and crochet 14 loops each side with sc in the middle. Use the 3rd smallest setting.
Off the heirloom crochet 14 loops together with sc. On the other side, crochet 4 loops together with sc, ch 7, 6 loops together with sc, ch 7, 4 loops together with sc. Turn. Sc + 4 ch-picot in sc, 9 sc in 7-ch sp, sc + 4 ch-picot in sc, 9 sc in 7-ch sp, sc + 4 ch-picot in sc.
Fold in half with picots together + the sc where 14 loops are held together. Fasten off and weave in ends. Attach on top of flag post.
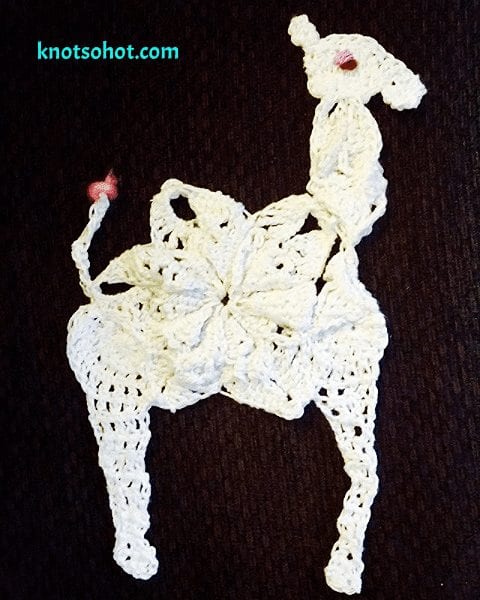
Crochet Hairpin Camel Pattern
Click here to get the Hairpin Camel Crochet tutorial.
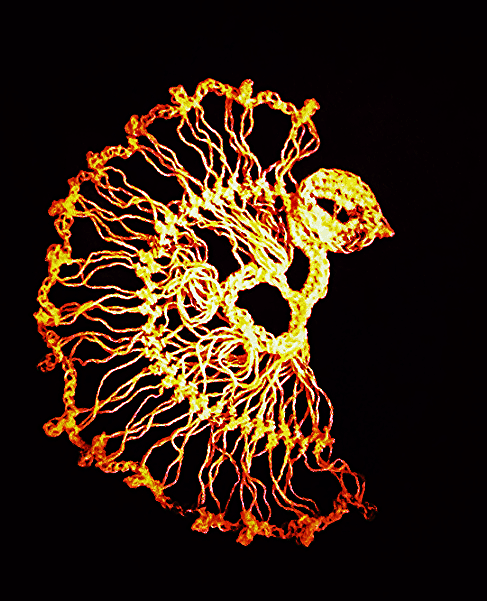
Crochet hairpin Phoenix pattern
Click here to get the hairpin crochet phoenix pattern.


Leave a Comment