Ball Jointed Doll (BJD) Ideas
Ball-jointed dolls (BJDs) crafted using 3D printing technology have opened up new possibilities in the world of doll-making. Traditional BJDs are typically made from resin; however, 3D printing offers more affordable and customizable options.
One of the main advantages of using 3D printing for BJDs is the ability to easily customise every aspect of the doll, from its size and shape to its facial features and articulation points.
Additionally, 3D printing enables faster production times and lower costs compared to traditional manufacturing methods. This accessibility has made BJD collecting more accessible to a wider audience.
However, there are some challenges associated with 3D printed BJDs. The quality of the print can vary depending on the printer and the material used, leading to potential issues with durability and overall aesthetics. Additionally, while 3D printing allows for a high level of customisation, it can also be complex and time-consuming to design and print a fully articulated BJD.
Overall, 3D printed BJDs represent an exciting new frontier in doll-making, offering collectors the opportunity to create unique and personalised dolls that were once only possible through traditional craftsmanship. As 3D printing technology continues to advance, the possibilities for creating stunning and lifelike BJDs will only continue to expand.
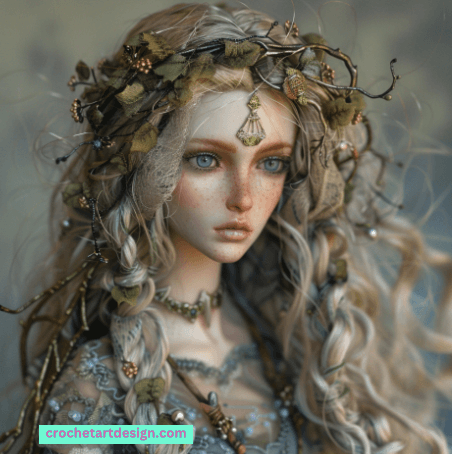
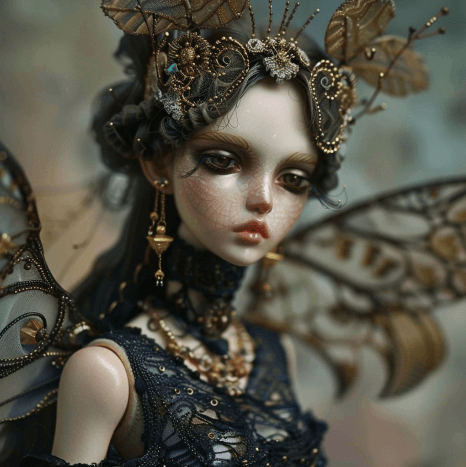
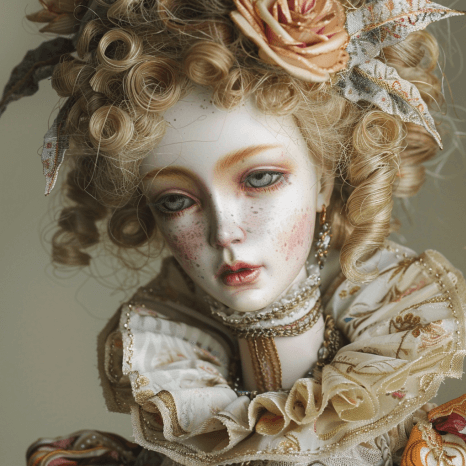
Ball Jointed Doll (BJDs) Make-Up Inspiration.

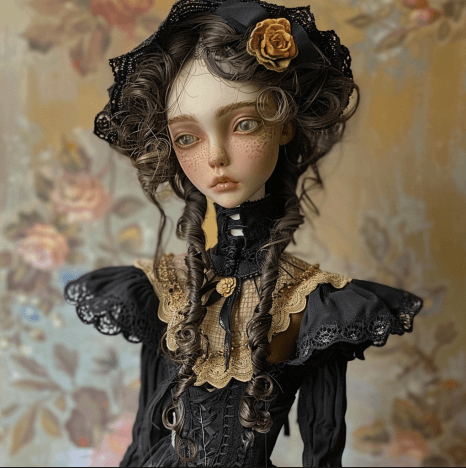
A very dramatic (almost) ball jointed Crochet Doll
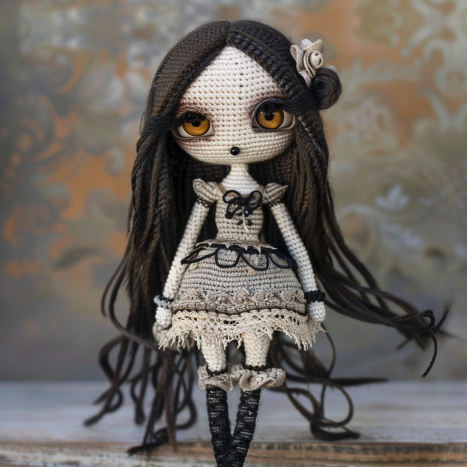
Creating a ball-jointed doll (BJD) through crochet involves several steps to make the different parts of the doll and assemble them with joints. Here’s a basic overview of how you could approach this project:
- Gather Materials: You’ll need yarn in the color of your choice, crochet hooks (size appropriate for your yarn), stuffing, and jointing materials like plastic or metal joints, or crochet loops to create joints.
- Plan Your Design: Decide on the size and proportions of your BJD and create a pattern for each part (head, torso, limbs) with increases and decreases to achieve the desired shapes.
- Crochet the Parts:
- Head: Start with a magic ring and work in continuous rounds to create a sphere. Stuff lightly as you go.
- Torso: Crochet a cylindrical shape, adjusting the size based on your doll’s proportions. You can add shaping for the waist.
- Limbs: Crochet tubes for the arms and legs, increasing and decreasing as needed for shaping.
- Create Joints:
- For each joint, you’ll need to create a socket and a ball. The socket is usually attached to the body part, and the ball is attached to the limb.
- To crochet a joint, you can create a loop (such as a magic ring) and work single crochet stitches around it, gradually increasing to form a ball shape.
- Assemble Your Doll:
- Attach the limbs to the torso using the joints. Make sure they are secure but allow for movement.
- Attach the head to the torso using a similar jointing method.
- Add Details:
- Once your basic doll is assembled, you can add details like facial features, hair, and clothing using embroidery, crochet, or other crafting techniques.
- Finish and Customize:
- Finish off any loose ends and make sure all parts are securely attached. You can also customize your doll further with accessories or additional details.


Leave a Comment